Saturday, October 2, 2010

Fashion on a Rooftop


I got the nice chance to support JZ Couture with a few pics of their current collection.

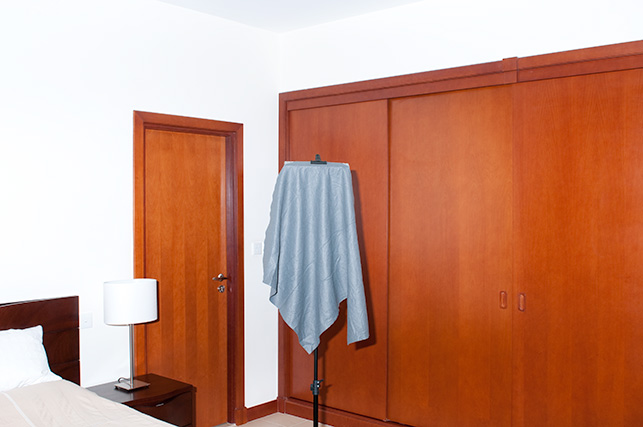
The Flash set up was a mix of SB800, SB900 and a Metz 45er.The basic set up can be seen in the following picture:


I used three SB 800 all set to SU-4 Remote Mode and Manual. All of them were for most of the time on full power. I used two umbrellas in lieu of a proper soft box.

One SB900 was on top of the camera and acted as commander in SU4 mode in Manual and doubled as fill light. Most shots were taken in Portrait orientation and I turn the Camera so that the flash is on the Opposite side from the main flash assembly. The fill flash setting was varied depending on my distance from the model and was between 1/8 and 1/32. I really like the distance display on the SB 900 it is an good help to get the right setting.

The red glow in the background was produced by a Metz 45 CT5 set to manual and triggered with a simple Metz remote cell (Mecalux 11).

The camera was set to manual.

My workflow is as follows:

1) Get the perspective right.
Select the lens, the right place to be for the photog and the model. I usually take some test shots of the scene at this step. And ensure that the manual setting is about right for the ambient scene. I usually start with 1/250 and the aperture indicated by the exposure meter of the Camera Matrix metering. (Matrix as this is the setting for the background)

2) Main light and fill
Set up the Main light and place it so light the model at the spot chosen in step 1. Again Test shots
The level of main light and aperture are chosen so that the main light is about 1 step higher than the ambient. (close the aperture one stop from the value determined in one, and bring enough light in the main light to be OK. (Now you know why there are three SB800.)
The fill is then seasoned to flavour between 1/4 and 1/16 depending on your distance to the model. I like the fill to be around 1 stop below main light. Test shots.


I expected strong colors in the dresses and went for colorful lighting.
In this test shot the ambient and main are set. The flashes have all 1 CTO gel and the camera WB is set to tungsten.


3) Add any background light as per your taste. The red filtered 45er gave me a dramatic light on the building structure and a glow in the lift doors. As it lights the background the intensity is set by placing it nearer or farer. In practice I found that these kind of background lights are no hassle as they can be left at the same setting and do not need to be disturbed if you or the Model moves.

4) As the light fades the time is adjusted downwards to keep the ambient at the desired level. Once the sun has set and the intense blue sky appears, there is quite a latitude to get lighter or darker skies by playing with the time setting.

5) I tried to direct the Model in a way so that she is at a fairly constant distance from the main lights. If that is not possible for a specific pose I adjust the aperture to compensate. (Do not forget to adjust the time accordingly if constant background exposure is desired.

6) In case of step 5 or in case of just me taking a different shooting angle the fill flash needs to be adjusted as described above.

I love to have the constant changing ambient light and go through different light settings and moods. Unfortunately the light moves fast near the equator and our blue hour is more like twenty minutes.

Also in Dubai there is every day a breeze that picks up at around dawn, which is generally nice for all residents, but evil in terms of setting up lighting equipment at the time. My best solution so far can be seen in the set up shot above. Three of the big (5l) water bottles just about seem to do the necessary to keep one light stand stable. Cheap, effective and reusable.


Overall I was happy with the set up. There were no misfires of the SB800 and the Metz let me only down when the battery was weak and the recycling times got too long. A quick change solved the problem.

One of the examples without the red background flash.


The second evening we started a bit earlier. The day has been hazy but the light in evening was nice and soft. I wanted to have more subdued colors. No gels and WB kept to daylight. The background with a green fl gel.


For this shot no background lights no ambient, just main light and fill.
With enough light the gray park deck surface becomes nice and light.


This is one of my personal favorites. I used the same main lights, but from the "wrong" side. So that the shoot through umbrellas are used like normal reflective ones. Very nice soft light. I also used the fantastic Nikon 105 mm 2.0 DC for this shot. I just love the crisp sharpness of the lens coupled with very nice bokeh.


Honestly a great experience and much more fun than test exposures of flash.
However the flash experiments and sporadic research must continue.
They will continue!

Thursday, September 23, 2010

Raw Power


This picture was taken mid afternoon in Dubai, with the sun about half high in the sky. The flash power needed in this circumstances is no mean feat, if an umbrella is used. The aperture was relatively open at 6.3 because I used a Polarizer to soak up light and smoothen the skin tones. The main light comes from a shoot through umbrella with three Metz 45 at manual full power. The fill light was an on camera SB 900 set to manual 1/32 which also triggered the Metz Set up.


The three flashes assembled with their brackets. All of them had the diffuser on, and were set to full Manual Output.


I used three photocells to trigger them individually, because I used three different models. CT-1, CT-4 and CL-4 digital. I did not want the three different models with very different Voltages to be wired together. Therefore one cell for each.
!!!! Caution !!!! If you connect a CT-1 and a low voltage model to the same cell electronics might be damaged!


The main question I want to explore today is the one of multiple flashes used to get a stronger output. Joe Mc Nally's Christmas Tree like set up with many SB-800 and SB-900 are legendary.
However there is physics to be considered. Combining two flashes does NOT result in double the guide number. Because light fall off in square relation to distance one needs a the power of 2 of number of flashes. Therefore to double the guide number (effectively double the distance)  FOUR units are needed. To quadruple the guide number SIXTEEN units are needed.

There is a German website http://www.plainpix.com/fototools.php which has a number of tools to easy calculate some photographic relations. On the bottom of the page is a tool where one can give in the guide number of combined flashes and the overall guide number is calculated.

Below is a table with Guide Numbers for additional flash units used. (Guide Number for ISO 100 in meters at 35 mm)
Flashes SB 800 SB 900 Metz 45
1383445
2544864
3665978
4766890
58576101
69383110
710190119
810796127

Looking at the table there are a few interesting observations.
1) For each additional unit added the actual increase in guide number gets less and less. The second SB 800 adds 16 to the overall guide number. The eighth adds only 6. The conclusion is that the "many small light" build up has its limitations and the point where it becomes really impractical is quickly reached.
2) Comparing models in the table one realises that maximum initial power is desirable in such a set up. For a guide number of 90 one needs 4 Metz 45ers compared to 7 SB900.
3) Big Stobes are really more practical from a point. 500 Ws = GN 85, 1000 Ws = GN 120, 1500 = GN 150. Comparing price and bulk the big ones are worth a consideration if a high power light output is needed. To replace one 1500 Ws big flash 16 SB900es would be needed.
Huh? Isn't that contrary to the whole carry less equipment story that started the strobist movement?
Well a full fledged big flash set up with 2 to 3 lights is much more bulkier than 3 or even 8 small flashes. The many small flashes are also more versatile in distributing them. And most of the time when full power output is not needed the small flashes do the same job as a big one with a weight advantage comparing light to light.
However when Raw power is needed the big ones come to the forefront.
Back to the picture above. The three Metz 45 have a raw GN of 78. With 200 ISO , 1.7 meter distance that would amount to an Aperture 64. The light loss in the shoot throough umbrella of roughly two stops brings us to Aperture 22. A further two stops of loss for the polarizer and we arrive at 11. The wide angle diffusers bring us to about 8. Close enough to the aperture found by test shots.
The sky is in the direction against the sun and is still very, very bright. Closing the aperture further to get the sky darker would have needed quite a bit more light.
So how far can I go by using all my available flash units fired together? 2 x SB900, 4x SB800, 2 x Metz 54-4, 6 x Metz 45 Total =152 I have not tried that yet. There will be another sunny weekend in Dubai.

Saturday, September 11, 2010

Batteries or Rechargeable


The intro picture has nothing to do with today's experiment except that I used batteries in the SB 900. Normally one tries to avoid a sharp shadow from the flash but in this picture I wanted the shadow to repeat the form of the sculpture on the little tower. The picture was taken in the castle of Gruyere/Switzerland . The sculpture is from the artist HAFIS. The old White balance and gel the flash technique is much stronger here due to the rusty surface.


Now back to on topic: The Metz 45ers get their power from one of three sources: A battery cage or a rechargeable pack that are inserted in the bottom of the grip, or and external battery pack.
Today we look at the internal sources only and ignore the external packs for the time being.

The flashes are delivered either with a battery cage to be filled with 6 AA (or mignon) cells. Some versions are delivered with a Metz rechargeable pack where 6 rechargeable cells are in a pack cage and a dedicated recharger. The individual rechargeable cells of the rechargeable pack can normally not be changed or taken out by the user.

Now we all know that the old NiCD rechargeables are a pain in the ass. They need constant fussing about, care and maintenance to work properly. So they have not been very practical for anyone without a full time assisitant, to whom to delegate charging and de-charging the packs once in a while and re-charing them at the right time. Whenever you wanted to do some shots at the spur of the moment the packs were not fully charged. Charging on top of the current charge provoked memory effect, which had to be healed later with days of charging and uncharging.
A complete un-charging and re-charging took 4 hours at best.

For most hobbyists the rechargebale pack went inbto the closet and the flash was operated with batteries in the battery cage. 2000% less hassle.

Later the NiMH rechargeables and the eneloops (like NiMH but hold the charge longer) came to market which made life a lot easier. Many people used a electronic charger like from Ansmann with 6 loading bays and one or two sets of NiMH or eneloops and popped them into the battery cage and went from there.

However (there seems to be always a however) the flash units have 3 pins in the power bay and the connection pins from the battery cage and the rechargeable pack are different.

There has been endless debate in many forums if it makes a difference in practice to put your rechargeables into a battery cage. Some people have posted nice instructions on their blogs how to dissect an old Metz Rechargebale pack with NiCd cells and replace them with Eneloops. Of course that has the drawback that you will habce to get a new charger as well, and it needs to be a charger that can charge the cells when they are connected in a row together (in the pack).

One nearly spooky aspect of Metz as a company is their efficient customer service. Ask any question on their website and you will receive an answer normally within two business days that not only answers your question but also some taht might be connected and for good measure throws in all manuals in pdf of all parts that were mentioned. I don't know how they keep up that stellar performance in this day and age, but way to go Metz!

The customer service is cited of explaining that older models suffer from less power, when rechargeables are used in the battery cage, newer models have a new electronic and it doesn't matter anymore. Still many posters in the forums insist that they do not see a difference in practice.

The reason for the two seemingly contradictory statements is simple. As explained earlier, one of the big advantages of automatic flash is, that the "unused" power is stored for the next shot. So if you have a realtively large aperture like 4 or 2.8 and shoot in Automatic or TTL mode, the flash might only use 20% to 50% of its power depending on distance and subject. So if the "fully" loaded flash has only 95% instead of 100% power, one might never notice.

However I intend to do experiments later on where we test limits of automatic flash and compare the 45ers to the modern hardware, I would like to know, if there is a difference in the flashes I own and how much is the difference.

And that brings us to today's experiment:


Three battery cages with: left fresh batteries, middle NiMH freshly re-charged, but well used and on the right the new NiMH recently bought and charged and no longer fully charged. Kind of a usual mix that can be found in any Hobby Strobist's bag.

Not in the picture but also used is a Metz NiMH pack (from 2009).


First I determined the current voltage of all packs:

The batteries gave 9.5V which is 6x 1.6 not unusual for fresh out of the pack.


The older NiMH gave 8.1V which is 6x1.35 again higher than nominal but not unusual fully charged.


The newer NiMH gave 7.85V which is 6x1.31, still well above nominal.


The Metz Pack gave also 8.1. Notice the difference in contact pins.


The set up is as follows:

- I tested three different flash types 45 CT5, a 45 CT4 and the newest 45 CL4 digital.

- The flashes were connected to my D300s (all of them are safe, I measured the trigger voltage) shooting a corner of a room. The motive is a grey felt cloth clipped to a light stand.

-Each flash is fired with full power in manual mode, the output is measured by a Gossen Lunasix used as flash meter.

-Ambient light is very low, curtains are drawn. The ambient light measurement would have been 1/4 second at f4 as determined by the camera.

- The camera is set to 1/60 and f/11 as determined by a flash meter reading, which is 7 stops above ambient level. A test shot without flash at this setting is completely dark (not shown)

- The camera and the light meter are set to ISO 200.

- Absolutely unnecessary as we will shoot full manual the flashes are also set to ISO 200. Just for fun.


The camera and flash (in this example 45 CT5) looked like this:


I like the display on the 45 CT5. If it is on a tripod it might not be easy to look on top. It is nice to see on the backside what has been set by wheel on top.


Test 1 45 CT5
Batteries


Flash meter reads 16.1 which is f16 and a 1/10 stop

(The Gossen measures in 1/10 of a stop and gives a decimal reading)


The New NiMH (eneloop type) noticable darker.


Flash meter reads 11.6
Oha! that is a half stop less!


The usual NiMH type.


The flash meter reads 11.7.

As expected nearly same result. 0.1 stop difference is within tolerance.


Test 2 45 CT4

Despite the lower number a newer model that replaced the CT5. Basically the same result. I do not repeat the pictures.

Test 3 45 CL4 digital


All variations I tried including the newer Metz recharge pack and an old Metz recharge pack produced the same result.

They did really improve the electronics quite bit!


The meter read in all instances exactly 16.9. The 0.8 difference to the first shot above come from the fact that I used the wide angle adapter on the first two flashes and not on the CL4 digital.


CONCLUSIONS:

1) The current models like CL4 digital don't care what voltage is delivered and always deliver constant output including maximum output.

2) The older models deliver around 0.5 stops less maximum power when rechargeables are used in the battery cage. more so there seem to be slight variations in maximum power depending on the actual voltage of the power source.

3) The wide angle reflector causes a drop of 0.8 stops maximum power. (the manual says 1 stop)

Open questions:

Which models are exactly with the new cool electronics?
When using automatic how much do I have to deduct from the maximum distance indicated when using rechargeables?

Answers soon

Tuesday, September 7, 2010

Back after the Summer Break

Many factors contributed to me having a blogging break during summer.

The biggest contributor was definitely the Dubai summer heat , as most of my experiments would require to be outside to have enough space. But there has also been a general lack of time and the annual vacation. Now the Eid al Fitter is here, temperatures have moderated a bit and I acquired some more second hand toys to play with. All a good combination to call the official end of the blogging break.


In this small season opener I want to repeat what the blog is about, what is the general plan and where we are:


The highly developed external flashes that are state of the art today include a multidude of settings and modes how to operate them. This technical diversity might be confusing to anyone, who has not followed the development of flash technology and techniques over the last 30 years.

I will look into each layer of the technical development and make some experiments to explain and see how they work. At the end we all might have a better understanding of the many current possible settings, their advantages and disadvantages.

From time to time I will also post a general flash related post, or if I made an observation regarding current equipment.


So far in the blog I

and (here).


The grand plan to continue the Blog is:

- finish the experiments with automatic flash and the Metz 45 family

- remote set up with automatic flash

- (Film based, "simple") TTL

- look at the different "advanced" TTL methods

- remote set up with "advanced" TTL

- "mixed" remote set up


The immediate upcomming installments will deal with automatic flash and the Metz 45 Family as laid out before the summer break:

- A number of experiments with automatic flash- comparing it to the modern marvels.
- Finish the introductions of the flash accessories.
- A number of experiments wit the flash accessories.
- An overview of the 45 family then and now.
- Experiments with a set up of multiple remote controlled automatic flashes.


From time to time I will also just throw in some flash pictures as they come along.

During the holiday back home I shot the followwing three with the SB-900 that accompanied me in the small kit. (I consider one fully grown flash essential and will rather leave a lens at home instead.)

1/4 second, f4, ISO 800, no flash

The first shot shows the ambient light shortly after sun set.
The ambient light is quite blue in nature and only the street lantern give a more warmer light to their lightened up area.

I thought how it would look like to get some light into the trees.


1/4 second, f4, ISO 800, flash

The second shot has the flash in the hot shoe turned on. Mainly the street in front of me is lightened up the trees are still quite dark.


1/4 second, f4, ISO 800, flash swiveled 45 degrees up.

What a funny light pattern on the street! Look at how even the tree on the right gets some light.

Conclusion?

More Swivel - More Fun!

Monday, August 9, 2010

TTL multi segment is great (sometimes)

First of all I have to explain that the loong silence is mainly weather related. It is really hot and humid in Dubai these days and I need to be outside to continue with experimental shoot outs. I really could not gather enough enthusiasm to face the weather conditions for an evening outside on top of Wolfis walk.

I had recently the good fortune that a good friend was involved as partner in the production of a beauty pageant "Miss Chinese Cosmos 2010 Middle East" and he gave me full permission of photography. Not an assignement, just for fun.

This is on the fly shooting where stage light is ever changing and you have no time to make elaborate changes of your set-up as "the show goes on".

My choice of equipment have been my trusted D300s, the 70-200 2.8 VRII. The 1.4 converter a SB 900 and the Battery Pack SD-9. The set up looked like this:


Also in the bag was the 17-35 2,8 and a set of new batteries for the flash + Li-Ion for the Camera

I was really blown away by the quality of lens, lens +converter and the flash. I used the flash in 99% of the pictures in direct mode as shown above, no diffuser, no indirect just straight. I only dialed in -1/3 stop for the flash. The shooting distance for me was between 10 -15m. The flash was set to TTL BL FP. Camera to Matrix Metering. The results straight out of the box where much better than I anticipated. Stage light and flash were always nicely balanced. Below some shots before the post processing:


This is the application for which the flash electronics and camera computers are actually made for. One can indeed forget everything and just shoot.

The SB900 Handbook stated that TTL would work fine up to 20m. I also wanted to find out what happens beyond that. Some shots were taken outdoors and much beyond that distance. The shot below for example at 26.6m. (That was the longest I could find with exact distance in the EXIF as all longer ones seem to show infinity.)

I am OK with the fill flash. SO the 20 m seem to be conservative.


The second big surprise for me was the SD-9 Battery Pack. My apperture was between 2.8 and 5.6 for most shots the distance as stated above 10m-15m. I never had delay in recycling or when shooting a burst any blanks in between. All in all I took about 600 shots and did not have to change the batteries. Respect!


If you want to shoot fast and/or many shots this thing is well worth its price!

There were very few exceptions, where a direct shot looked rather crappy, like this one of the audience, where the front people are OK but then there is a dramatic light fall off. I also liked how the automatic kept at least the front row in good exposure. Canon tended in this kind of situation to slightly overexpose the foreground in my experience.


Turned the flash to the ceiling and I got the following shot:

There is still fall off in the far corner, but I was impressed by the overall light output of the SB-900. (shots taken with the 17-35 2.8)

Finally one of my favorite shots post processed: The overall winner of 2009


What an interesting evening.

Wednesday, April 21, 2010

TTL multi segment sucks (sometimes)


Just a small interlude to show you why modern "superduper" TTL can drive you sometimes crazy and a good reason to shoot Manual. The very sophisticated microchip driven TTL "I evaluate ambient and flash in 1000 segments" can sometimes lead to strange results.

If you follow my blog you have realised that today's flash automatic at its highest form has evolved with ever more layers of technology. In my Blog I try to show the steps in this technical development and show examples of the advantages and disadvantages each technology presented.

Today's top model flashes have ALL of the past layers in them and come with thickly handbooks. My first flash had literally a one page instruction the size of a postcard.

In this Blog I want to show a short coming of the most current technology. I will not explain how we ended up with it, that will become clear with the future installments of the Blog.

Take a good look at the picture above.

I wanted to have a picture of the car, with Burj Khalifa in the blue evening light after sun down and a reflection of the cars headlights in the puddle. I planned the shot long ago, because puddles are rare and are not around for long in Dubai. The evening after the rain I went to the spot I had scouted out in advance. The camera was quite low. To get the perspective right and because I wanted the car to look a bit more aggressive. (As far as possible with a long limousine.)

I started in P mode adjusted the aperture to my liking and played around with the ambient light setting by dialing in some negative adjustment until I had the right background light level. Switch on my 4 Speedlights all in remote i-TTL driven by a commander.

The picture on top was the result? You see very, very little flash if you look carefully. I dialed the flash up with the commander as far as I could with pretty much the same result.

At that point I started swearing. The light moves fast, fast, fast when you are near the Equator.
I thought I made some mistake with the set-up and checked camera and flash settings.
All OK, all flashes firing.

Then it hit me: %/*-@#$% i-TTL. Two problems in the scenario:

1) If you dial down ambient light by reducing the main exposure compensation that reduces the complete exposure (my setting was at -2) so if you dial up flash exposure it is relative to this base setting. The maximum the controller allows is plus 3. (so my overall flash exposure was only overall plus 1)

2) The headlights from the car were in the picture. Causing the i-TTL to "think" that there is already waaay too much light in the highlights and suppressing the flash down to next to nothing

OK Switch Camera to Manual and all flashes to Manual.


There you are!

The problem is, that the design approach for i-TTL comes from the fill flash world. You know, models in bright sunlight further brightened up. That is what it does perfectly. It struggels in some other situations and specifically when you do not want to smooth out contrast but rather increase it.

Next post we go back to a time when such problems did not yet exist.
Stay tuned

Saturday, April 17, 2010

Metz 45 CT-1 and Mecamat 45-20

This is the first installment dealing with the accessories available for the 45 series.

There are some that fit all 45 ers, others are general flash related and do in fact fit most flashes and some are specific for the model.


The filter set fits all 45ers. The early versions (45-21) had red, green and blue filters plus a clear one for your own gelantine filters and a wide angle adapter. The Wide angle adapter came already as a standard with the flash and extends coverage to 28mm. By buying the filter set you ended up with two. In later and current versions (45-32) it was replaced by a yellow filter. The filter sets seem no longer to be on the market and is not listed on the Metz website anymore. I found it to be one of the really useful add ons.  But maybe Metz decided to stop production in view of the many gel filter sets that are on offer.

In the picture on the right from the filters there is the simple photo cell Metz Mecalux 11. I said simple, because it can not suppress pre-flashes and is today only useful in 100%  manual set ups. Nevertheless I own several of it. It's big advantage is, that it can take any trigger voltage a 45er or 60 can produce. It is my go to trigger for the older CT-1s that I do not want to attach to any electronic device.

I did another little test with the Mecalux 11 and an SB 900. The modes which do not use a pre-flash on then SB-900 are:
- the Manual mode
- the Guide number mode
- the Automatic mode if the pre-flash is disabled in the menu

The Manual mode is for a number of photographers the preferred (Strobist) way but the Automatic mode can also be pretty useful as we will see later.

It is worthwhile to note that the menue option of the SB 900 to disable pre-flash does NOT work in any of the TTL modes with a DSLR. Pre-flashes are emitted and trigger simple photo cells such as the Mecalux 11.

For the Metz 45 CT-1 to be fully usefull in Manual mode you need an accessory called the Mecamat 45-20. It combines an external sensor with an upgraded electronics. Metz has produced a number of different versions of the Mecamat for different models of the 45er. Mecamats can ONLY be used with the model they were designed for.   

So only the 45-20 will work with the CT-1. (Please note that later versions of the CT-1 have low voltage electronics and use the mecamat 45 -43. The later versions start at serial number 534000) The logical reason is, as mentioned above, that the device is an upgraded version of the flash sensor and electronic and it had to be changed whenever newer electronics were used.

The upgrade provided by the Mecamat has three major benefits :

1) In Automatic mode it extends the number of usable Apertures to 9
2) In Manual mode it allows manual power setting in full stops  from 1 to 1/64
3) It has a spot meter option. (bride in dark church scenario)

It was the most useful accessory when the flash came onto the market and it effectively extends its usefulness to the present day.

There are a number of people who collect a full studio set up from used Metz 45 CT-1 and Mecamats in Strobist style on the cheap from the bay.

When the CT45-1 came on the market the Mecamat was marketed as a Macro-Tool, but it is much more versatile than that.


Seen from the back there are five elements. on top is the left right switch. It activates either the extended automatic dial on the left side or the manual dial on the right side. A white indicator shows which side is activated. Below in the middle is the flash ready lamp which replicates the flash ready status from the main unit. Below the flash ready lamp is a red led which lights up shortly if there was sufficient light. (The sensor did switch off the flash.) At the bottom uf the housing is a screw dial that allows to adjust the angle of the Mecamat upwards or downwards, in order to point the sensor when using the spot metering mode. Pointing downwards is also speciffically suitable for Macro work, when the subject is very near to the camera.  The little red button on the hot shoe can be used to trigger the flash for a test shot.


The front can be tilted to the side and the hole then acts as a visor so that you see where the Sensor is aiming. In the back a plastic part can be pushed out to be used for aiming with the visor.  (you can see it in the next picture at the feft sid near the bottom of the case in its pushed in state.) the The sensor itself can be turned with its black plastic rim and then pulled out to give a spot metering effect.


On the right side is a dial that looks very simmilar to the one on top of the the flash itself. When the mecamat is attached the dial on top of the flash is without function and it does not matter how it is set.
The inner dial is used to select the ISO. The outer dial can be set from Manual full power to 1/64 power. For each stop the table indicates the flash duration time between 1/300 to 1/16000 of a second. The upper part matches apertures with distance for the chosen setting. The highest ISO setting is only 400 but that does not matter as it is anyway only for informational purposes. A strobist shooting digital will get the right power setting by test shots and can ignore the ISO setting completely.

On the left side is a second simmilar dial and a switch. The switch can be selected to activate a "green" and a "red" modus. Waht you can see is currently active. In each modus 5 automatic apertures can be selected by turning the big dial. The "red" modus allows lower apertures. The  "green" modus allows higher apertures. The two modes overalp for one in the middle resulting in a total of 9 selectable apertures. For ISO 100 the apertures range from 2.8 to 45. The scale also shows the maximum distance for each aperture. Again ISO 400 is the largest ISO, but that is not tragic either. As aboove mentioned the ISO settings dial is just there to mechanically align the values printed on the dial. If higher ISO values are set in the camera simple adjust the aperture by the muber of stops necessary.

For example the read out of the dial says 400 aperture 2.8 and your camrea is set to 800 you need to close the aperture one stop to 4.

I will give a more detailed explanation how to work with when we come to an automatic set-up with multiple flashes.


This is my initial set up with a mecamat. I have swiveld it slightly to show that it could be moved about 45 degrees left or right.

Making this picture I used the Nikon 300s and the SB-900 in the hot shoe. The camera is set to manual and the Flash to slow sync TTL. It is pointing 45 dregrees up, the white reflector card is out and I use the wide angle reflector.

Following are a number of test shots that show how to make ugly pictures when using manufacturer recommended settings.

This is - no joking - the shot with level flash head Camera set to Programm and slow flash sync. The problem is the 3D Matrix Metering which wants to get a correct exposure for the focus distance, ignores the back ground and struggels with the combination of black and shiny subject surfaces. A picture straight for the bin.


Now this is the opposite extreme shot straight into the ceiling otherwise like above. My background is OK but there is no fill from the camera angel and my main subject is underexposed in its own shadow.


This one is nearly good.The camera is set to Program the Flash to slow sync TTL. It is pointing 45 degrees up shooting forward the white card is out and I use the wide angle reflector.


I can only encourage you to go and really play through all options with you gear and compare the results. The cameras and flashes of today are full of microchips that have a mind of their own and the only way you keep halfway in control is, to know how they react to each setting. You can also go the strobist route, dial in manual and be in control from the start.

Now back to the main program and the key question: How useful is this combo for my modern DSLR? There are three questions to be answered:

1) How high is the trigger voltage and can I attach it to my camera?
There seem to be three different types of 45 CT-1 on the market. Very early models seem to have voltages over 300V which is a clear NO to any modern camera. I could not find anyone who can confirm the serial numbers for the first batch. But it seems to be only a small run of early production and these are rarely encountered in today's second hand market. The second production model has numbers lower than 534000.  I tried to find as many references I could of people who measured the voltage of their CT-1 and so far all information I could find points to the following:  Models with a serial number beween 200000 and 534000 seem all to have a trigger voltage around 230V. My own has something like 219. BUT the 200000 for the lower end of the range is a provisional figure based on more than incomplete observation and in the absense of better information. Measure before you connect!!!
Hmmmm the camera manual of my Nikon says that it is OK with 250V maximum. Will I attach a CT-1 to it?  NO!
I fully admit that I am a chicken when it comes to wrecking expensive equipment.

2) Is It usefull in a remote flash set-up?
If your remote set-up is manual flash you will need the Mecamat 45-20. (or 45-43 for later versions) If it is Automatic flash it is useful in itself but even more usful with the Mecamat (9 stops range).

3) Can it be integrated with CLS?
Not really. It can serve as background lights or for a very specific purpose and also in this role only if you find a remote cell that can supress pre-flash.

This picture is part of a shoot for the Swiss artist HAFIS. He was working in a ceramic tile factory on a set of large handpainted tiles.
Knowing that a factory is mainly gray, gray and more gray I took two 45er along, used the red and blue filters and set them to remote triggered automatic mode. Suppressing the pre-flashes I got nice dramatic back ground light fitting to the subject of an artist. He is lit with an SB-900 in the hot shoe.

Admittedly the flashes used in this shot were not CT-1 but CT-3.
But the same result can be achieved.


A Macro set up in the early eighties looked something like this for me. The lens was in a retro mount. The flash was sometimes used with lumiquest reflector when softer light was required.


It could be used to make something like this


Stay tuned for more automatic flash experiments.